Installation
In this guide, we’ll walk you through how to install Araali software into your Kubernetes cluster or Linux VMs and secure your cloud native runtime. We have made it easy for you to single-click install as well as uninstall Araali.
Overview: Installing Araali is simple. The first step is to self-serve onboard by creating an account on Araali UI. After that, for K8s, helm install Araali software onto your Kubernetes cluster, run the Software you want to secure, and come back to the Araali UI for insights.
Steps for securing workloads running on Linux VMs are similar and described below.
NOTE: You should have outbound port 443 open for Araali to talk to its SaaS backend (normally it is already open).
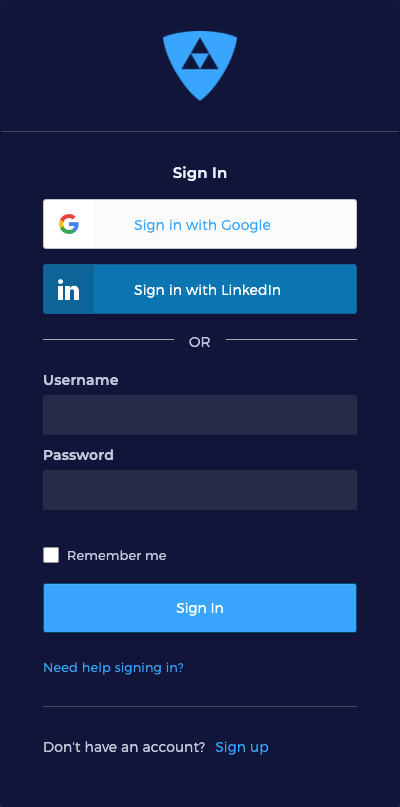
Step 1: Sign In or Create a new Login using the Araali UI
NOTE: Your Araali account is automatically created on first login. If you want to be part of another person’s (or, team’s shared) account, ask them to add you as a user in their account before attempting to login.
Visit the Araali Console in your browser. If you have a Gmail or GSuite powered email, click the “Sign in with Google” button to access the Araali UI with single sign on (SSO). There is no need to create a seperate Araali login.
If you do not have a Google powered email, use the “Sign up” button to create an Okta powered account using a non-google email.
Step 2: Generate values.yaml for Installation
Go to Araali UI and select Administration -> “Cluster Fortification” in the left-hand panel.
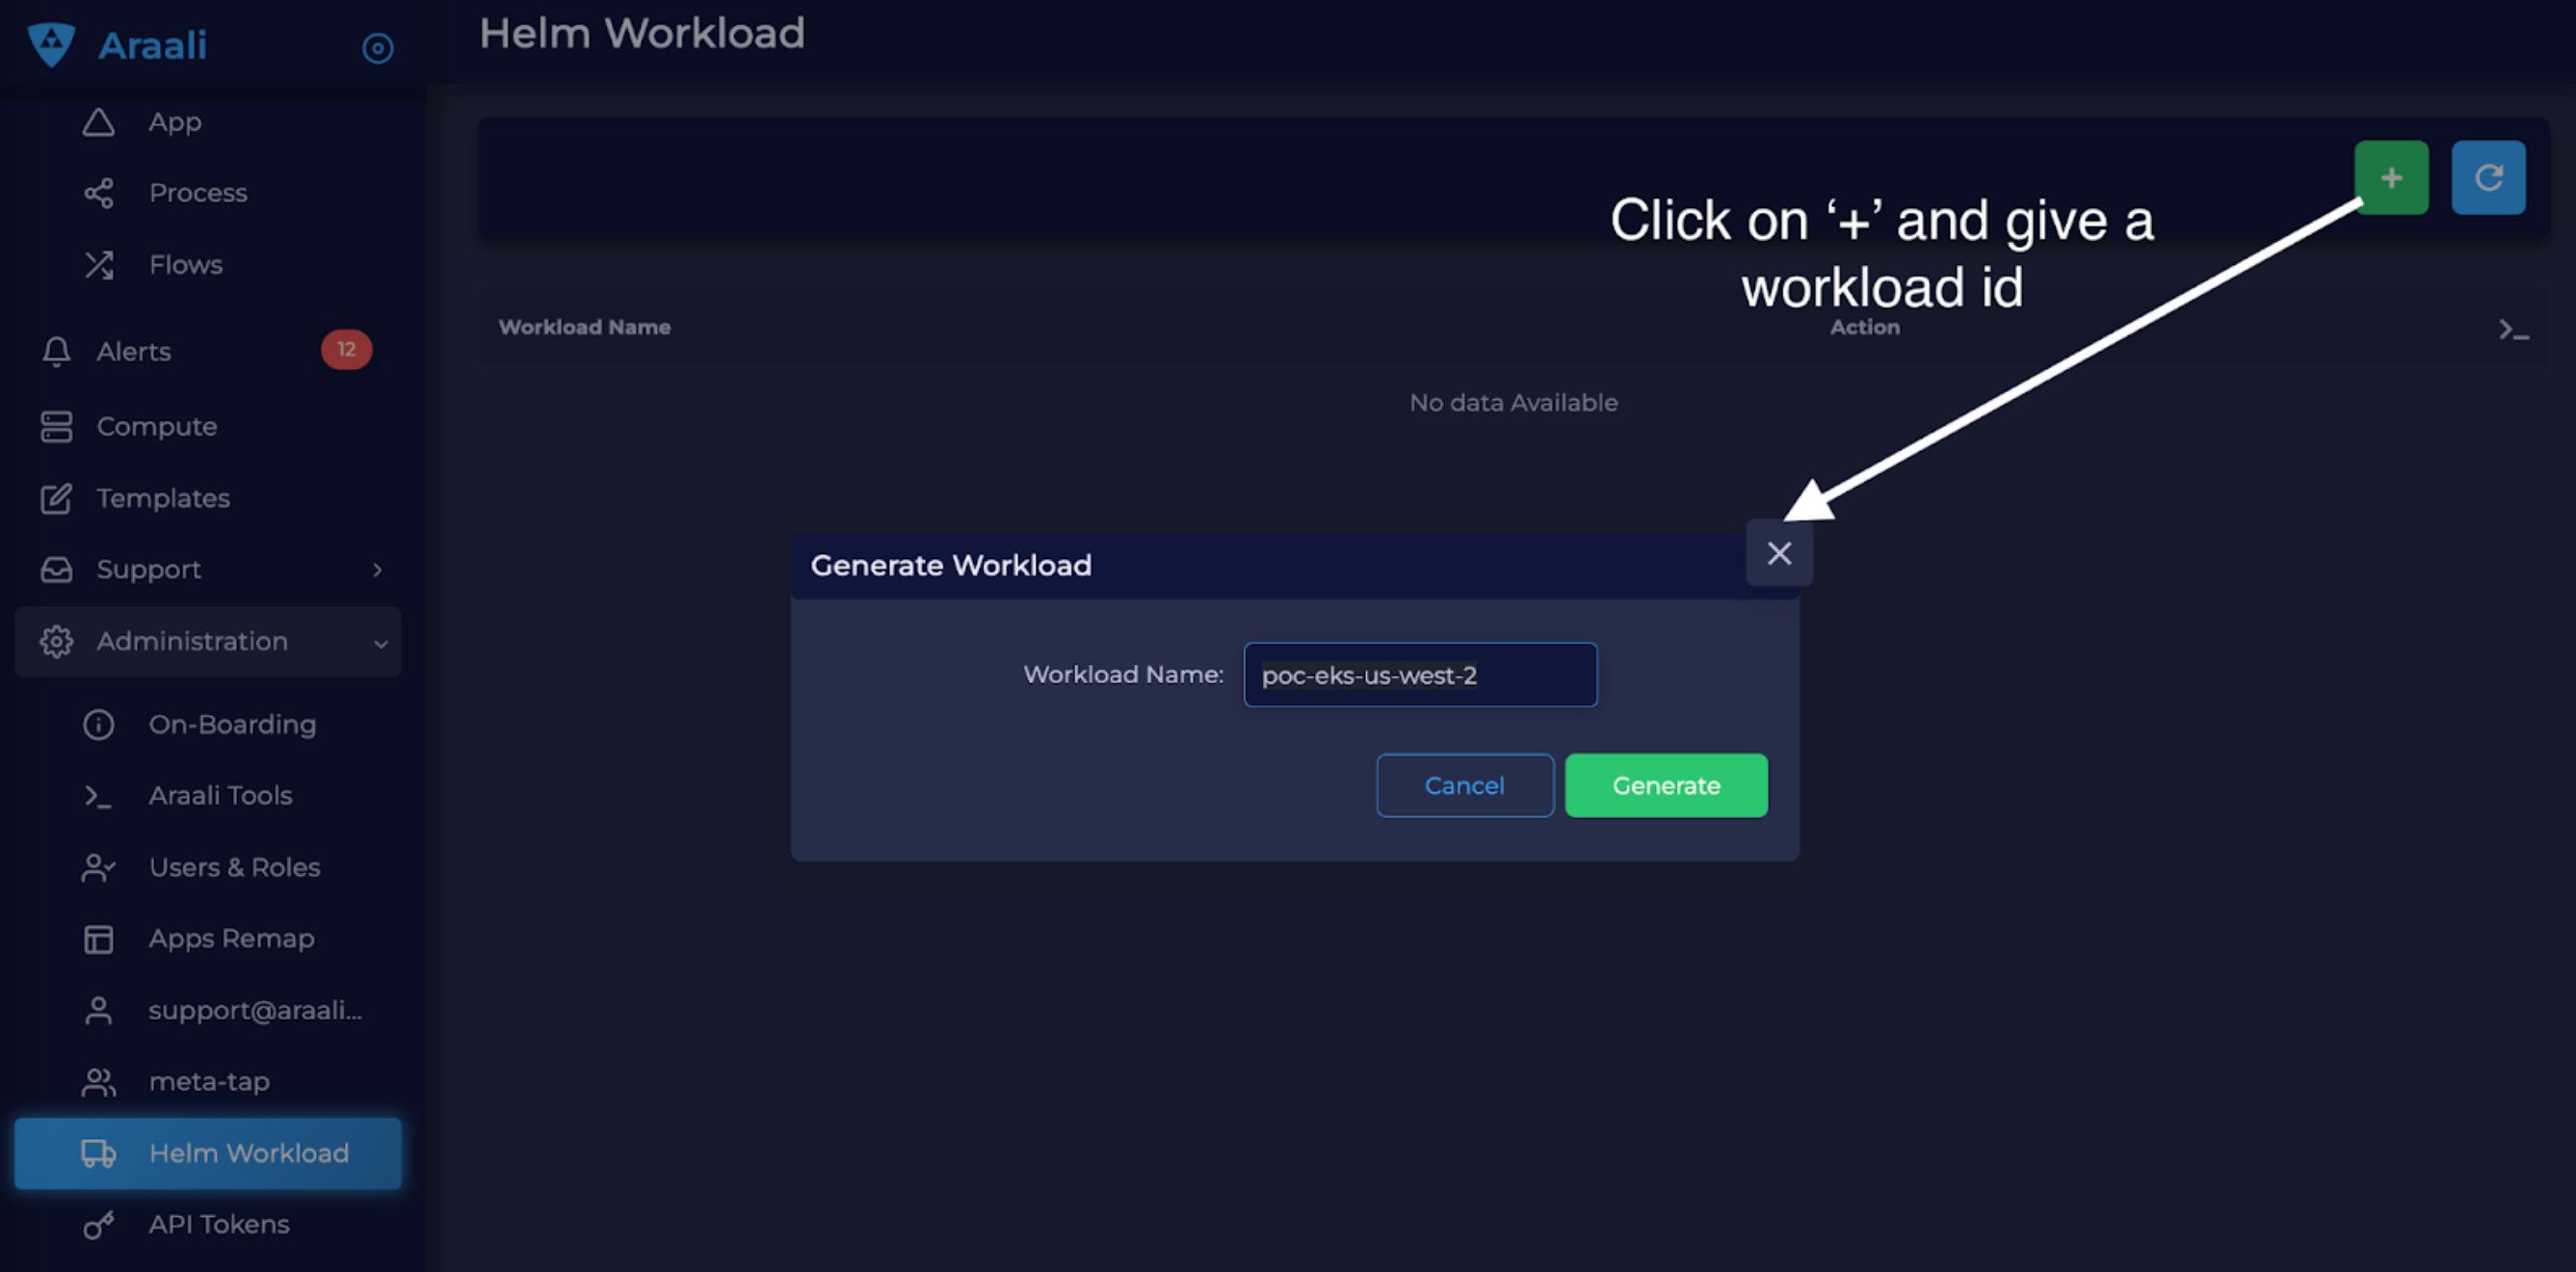
Click on “+” and provide a name for your workload template. The generated values.yaml can be used for both VMs and K8s clusters:
To fortify multiple clusters the “zone” in the downloaded values.yaml must be changed per cluster (to represent the name of the cluster). For e.g. Kustomize can be used to automate multi-cluster deployments.
To fortify VMs both zone and app must be changed prior to fortifying individual VMs.
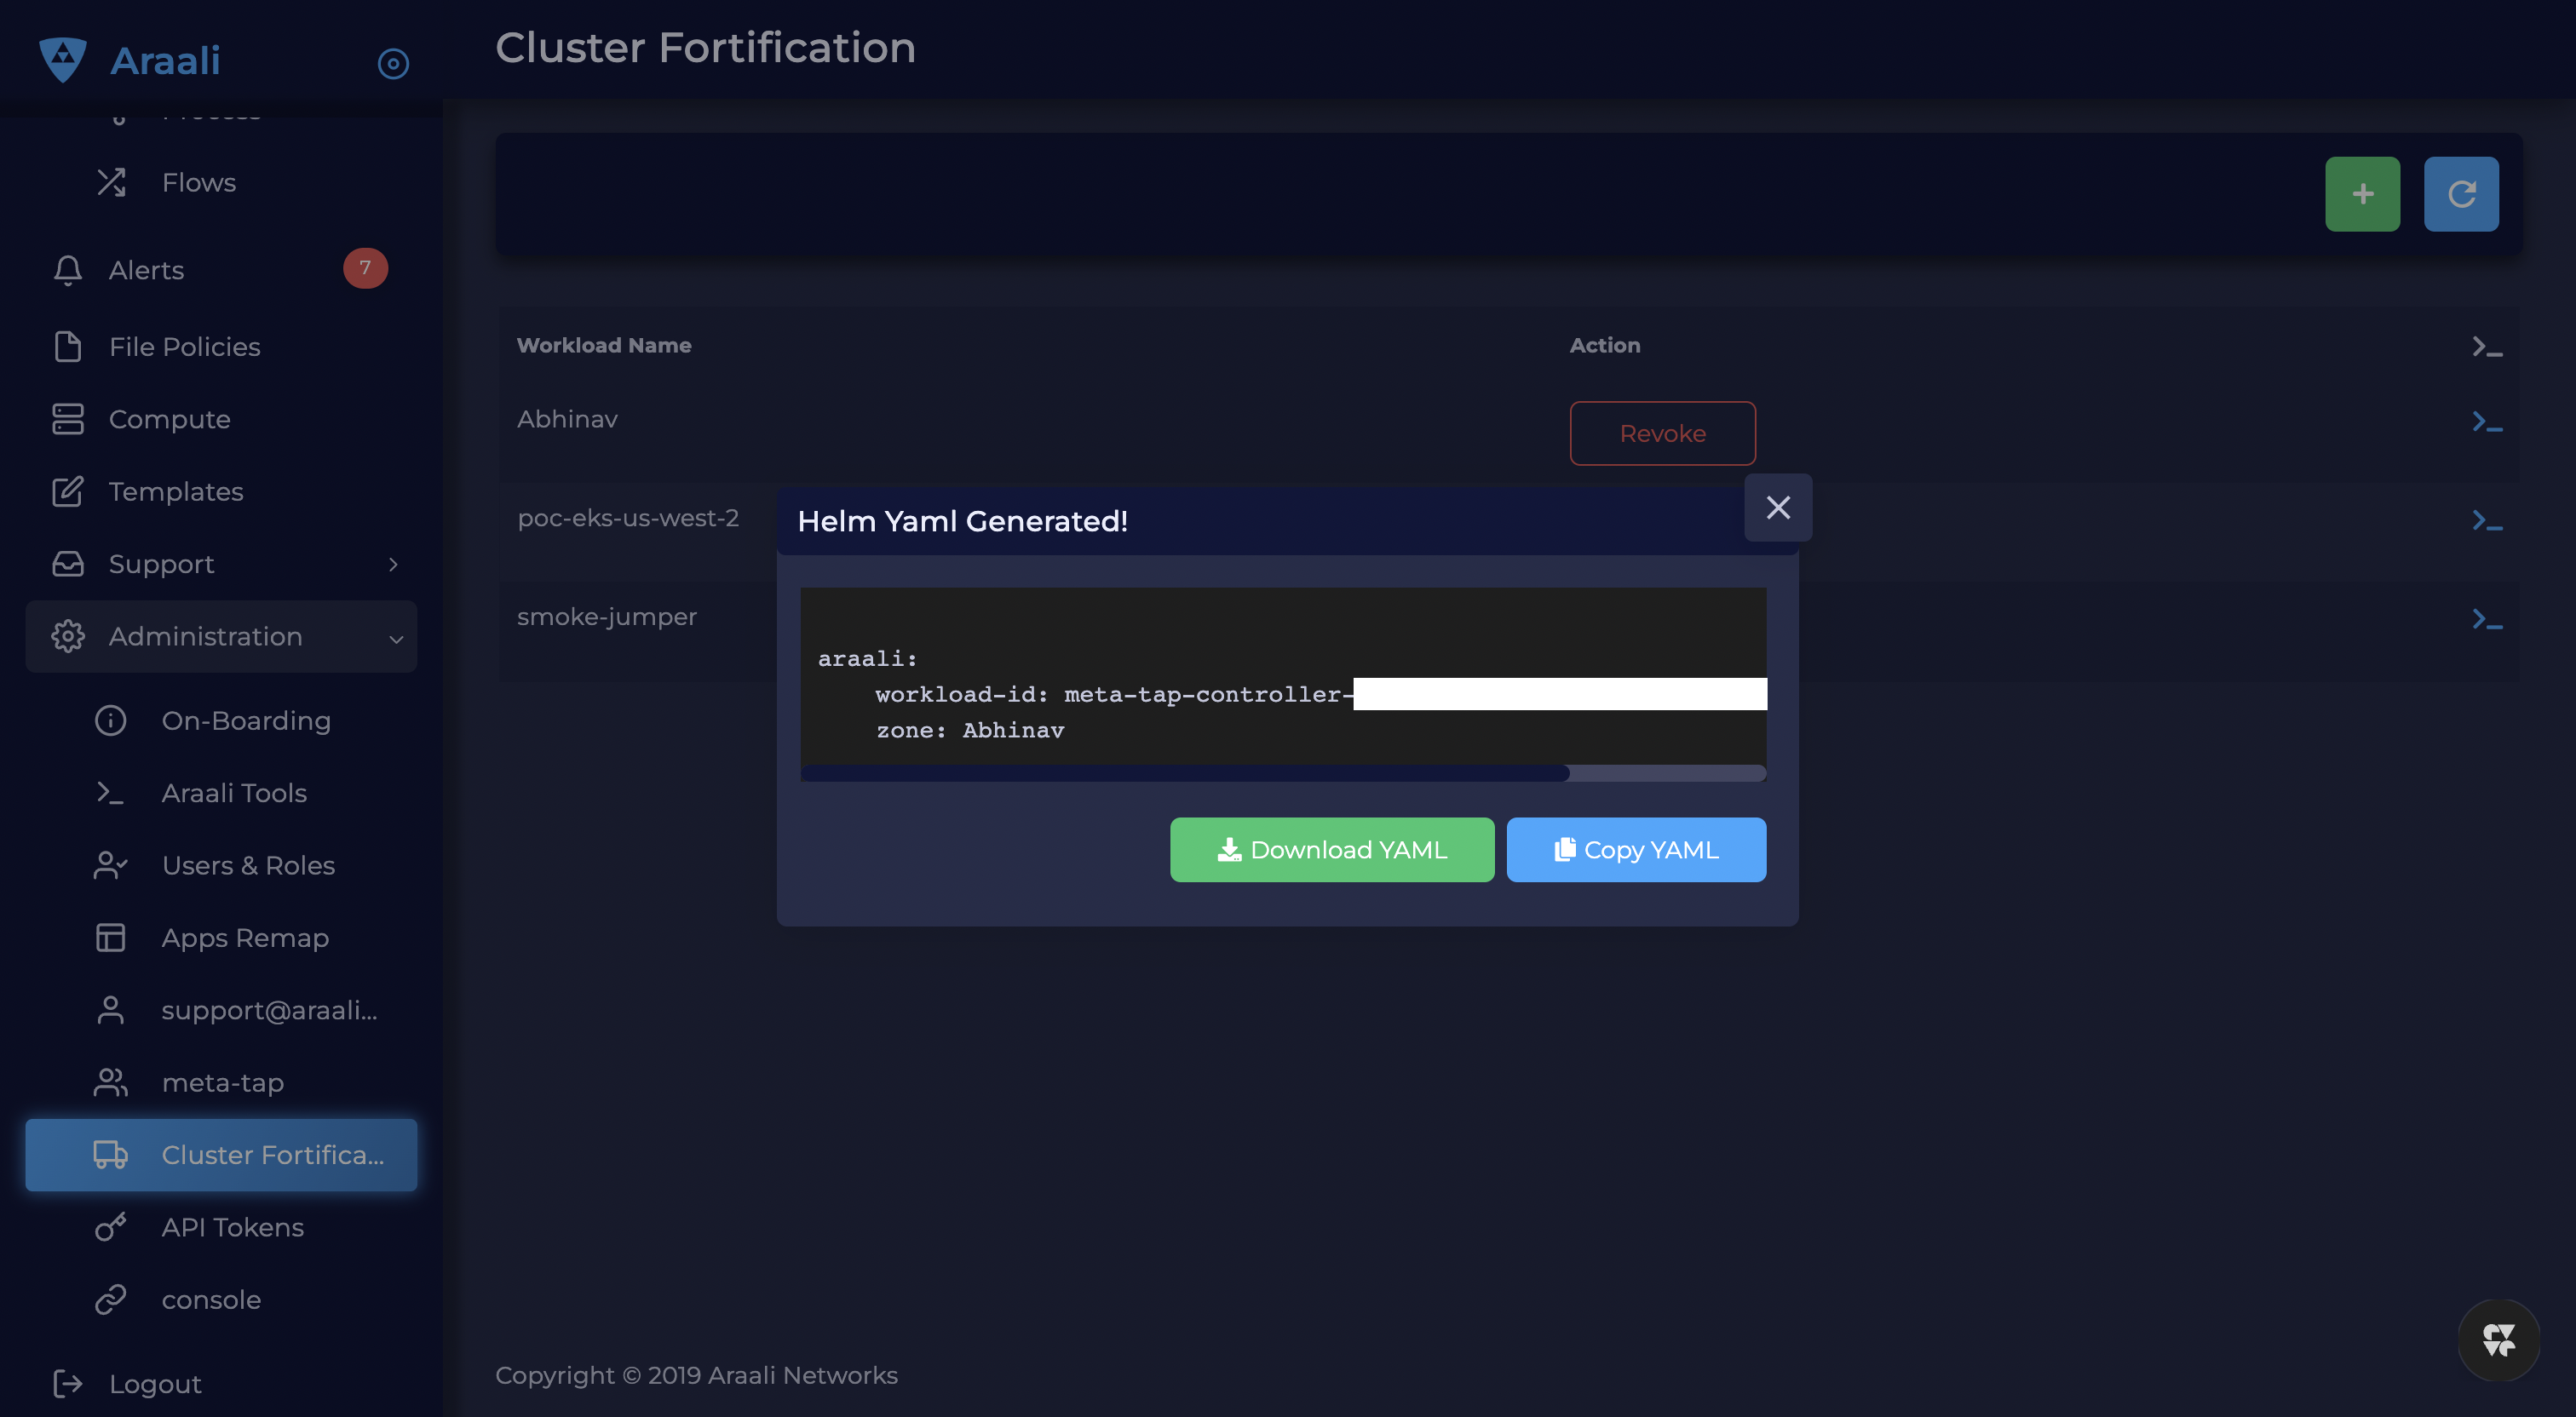
Now download the file (example below) and save it as values.yaml file
araali:
    workload_id: <wrk-id-variable>
    zone: <zone>
Step 3A: Installation for Kubernetes
Add Araali Repo and Install the Helm Chart.
Add Repo*:
helm repo add araali-helm https://araalinetworks.github.io/araali-helm/

#If you have already added the repo, instead run this command periodically to keep you repo up to date:

helm repo update
Check if you are fortifying the right cluster by looking at the current context, the name with a “*” is the one you are pointing to right now:
kubectl config get-contexts
Install by using the generated values.yaml file:
helm install -f ./values.yaml my-araali-agent araali-helm/araali-agent
Uninstall:
helm uninstall my-araali-agent
# The above only uninstalls the installer(due to a bug). Use the command below to uninstall all araali components
kubectl delete daemonset,namespace,serviceaccount,clusterrole,clusterrolebinding,deployment,service,secret,configmap,crd -l is_agent=true -A
kubectl delete daemonset,namespace,serviceaccount,clusterrole,clusterrolebinding,deployment,service,secret,configmap,crd -l is_araali=true -A
Step 3B: Installation for VMs
NOTE: If you have already fortified your Kubernetes cluster, you do not need to additionally fortify your VMs. These instructions are only for the non-Kubernetes case.
Cloud providers like AWS provide a hook to install software at the time of VM launch. The generated values.yaml can be used in these init scripts to perform the VM install at boot. The same approach also works on a live running VM (even without the init hook). It can also be used to embed into terraform.
We need to change the zone and app in values.yaml based on where (e.g. the zone could be changed to prod, staging, qa, or dev) and what app (e.g. redis, mongoDB, cassandra) will be running on the VM.
Example: Install via AWS EC2 Instance UserData The following represents a way to embed araali software into an ec2 instance via UserData at bootup time. Both values.yaml, and araalictl should be accessible to the ec2 instance. Embed this script into UserData:
#!/bin/bash
# Note: before every command using wget on a file, run the following command: rm -f <filename>
# Otherwise wget will name the file as .1, and you will be working off a stale copy
wget -q https://s3-us-west-2.amazonaws.com/araalinetworks.cf/araalictl.linux-amd64
wget -q https://<resourceAccessUrl>/values.yaml # depending on where customer keeps this file
chmod u+x araalictl.linux-amd64
./araalictl.linux-amd64 editvalues -zone=<zone> -app=<app> -f values.yaml
sudo ./araalictl.linux-amd64 fortify-local -f values.yaml
On success, araalifw agent should be running on the VM, and providing functionality. Any failure conditions are in general recorded in /var/log/cloud-init-output.log.
Uninstall:
sudo ./araalictl.linux-amd64 unfortify-self
Review the Results
Go to the Araali Console and log in with the same email that was used to authorize araalictl.

The Insights section on the Dashboard pull out nuggets of high priority information for you, such as:
Database, DB-as-a-Service - your crown jewels
World Exposed Process - check for accidental exposures
Privilege Access Process and Containers - these have over privileges and can cause significant damage if exploited
Critical Vulnerability Containers - these are running with critical CVEs
SaaS Services - All the SaaS services consumed by your apps
Log4j - to identify if you have any log4j vulnerability in your environment
You can click on any of the cards to review the details.
Access the assessment report using the following command
./araalictl assessment -report
Appendix
If you are unable to use Helm for K8s fortification follow the below instructions
Requirements: You should have access to a modern Kubernetes cluster and a functioning kubectl on your local machine. If you don’t already have a Kubernetes cluster (e.g. EKS, GKE, AKS, RancherD), one easy option is to run one on your local machine. There are many ways to do this, including Canonical’s production-ready microk8s for Ubuntu .
You can validate you have a working setup by running
kubectl version --short
You should see the output with both a Client Version and a Server Version component.
Fortify your cluster using Araalictl
Check current context, the name with a “*” is the one you are pointing to right now:
kubectl config get-contexts
Fortify your cluster
If araalictl and kubectl are running on the same machine:
./araalictl fortify-k8s -auto -tags=zone=<optional-zone-override> -context=<context of k8s cluster>
If araalictl and kubectl are not running on the same machine:
# Create yaml file to fortify your cluster
./araalictl fortify-k8s -tags=zone=<optional-zone-override> -context=<context of k8s cluster>

# The above command will generate araali_k8s.yaml file. Copy it to the k8s control plane (where kubectl is running) and then apply
kubectl apply -f araali_k8s.yaml
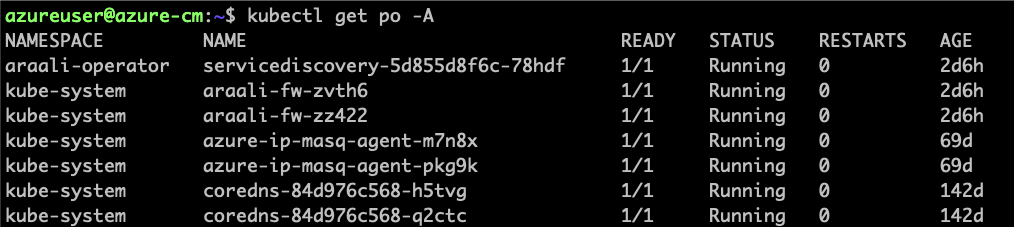
Check if Araali is installed
Araali should be running in two namespaces (1) araali-operator and (2) kube-system:
kubectl get pods -A
Uninstall Araali
If araalictl and kubectl are running on the same machine:
./araalictl fortify-k8s -delete -context=<context of k8s cluster>
If araalictl and kubectl are not running on the same machine:
kubectl delete -f araali_k8s.yaml
VM Installation using Araalictl directly
Araalictl is a command line tool that can also be used to fortify VMs.In the steps below we will first show how to download and authorize araalictl and then fortify a VM with it.
Step 1: Download Araalictl
If this is your first time running Araali, you will need to download the “command-line tool” araalictl onto your local machine. You can either download it from the Araali UI or curl it in.
To download araalictl from the Araali UI
Navigate to Download, under Support on the left-hand panel, and download the araalictl for your Linux or Mac machine.

To curl araalictl directly to your VM, run:
# On Linux
curl -O https://s3-us-west-2.amazonaws.com/araalinetworks.cf/araalictl.linux-amd64

# On Mac
curl -O https://s3-us-west-2.amazonaws.com/araalinetworks.cf/araalictl.darwin-amd64
Step 2: Authorize your Araalictl
First, make your araalictl executable:
chmod +x araali*

ln -sf araali* araalictl
Authorize your session
sudo ./araalictl authorize <CORRECT EMAIL ADDRESS>
NOTE: To correctly authorize araalictl, please enter the same email that was used to sign into the Araali Console.

Now, go to Araali UI and Navigate to Araali Tools, under Administration on the left-hand panel.

Click on the “refresh” button if you don’t see “Approve” and click to approve araalictl. Also, the session-id listed on your araalictl will match the session-id shown in the UI.
The “Approve” button should go away and you will see the “Revoke” button which could be used to revoke the araalictl

Step 3: Fortify your VM
Requirements
- You should have a Virtual Machine already set up in order to fortify it with Araali.
Alternatively, if you have a cluster of VMs and wish to fortify them all through a CM VM, see the Remote Fortification section.
You should have port 443 egress open on all VMs for Araali to talk to its SaaS backend.
Self Fortification
1. Generate local ssh-keys (optional and only if you don’t already have id_rsa.pub in your ~/.ssh directory)
ssh-keygen
2. Copy the public key to authorized_keys to allow passwordless local ssh access
cat ~/.ssh/id_rsa.pub >> ~/.ssh/authorized_keys
3. If you don’t have passwordless sudo setup, edit the sudoers file as shown
sudo visudo
4. Allow for password-less sudoers
# Scroll to the very bottom of the file, add the following line
# Replace <user> with the user for the VM
<user> ALL=(ALL) NOPASSWD: ALL

# ^X to save and exit editor
5. Self-Fortify
./araalictl fortify-live -fortify -tags=zone=<zone_name>,app=<app_name> localhost
Remote Fortification
Check Control VM
- A Control VM (CM VM) that has ssh access to the other VMs is used to remotely fortify from one place.
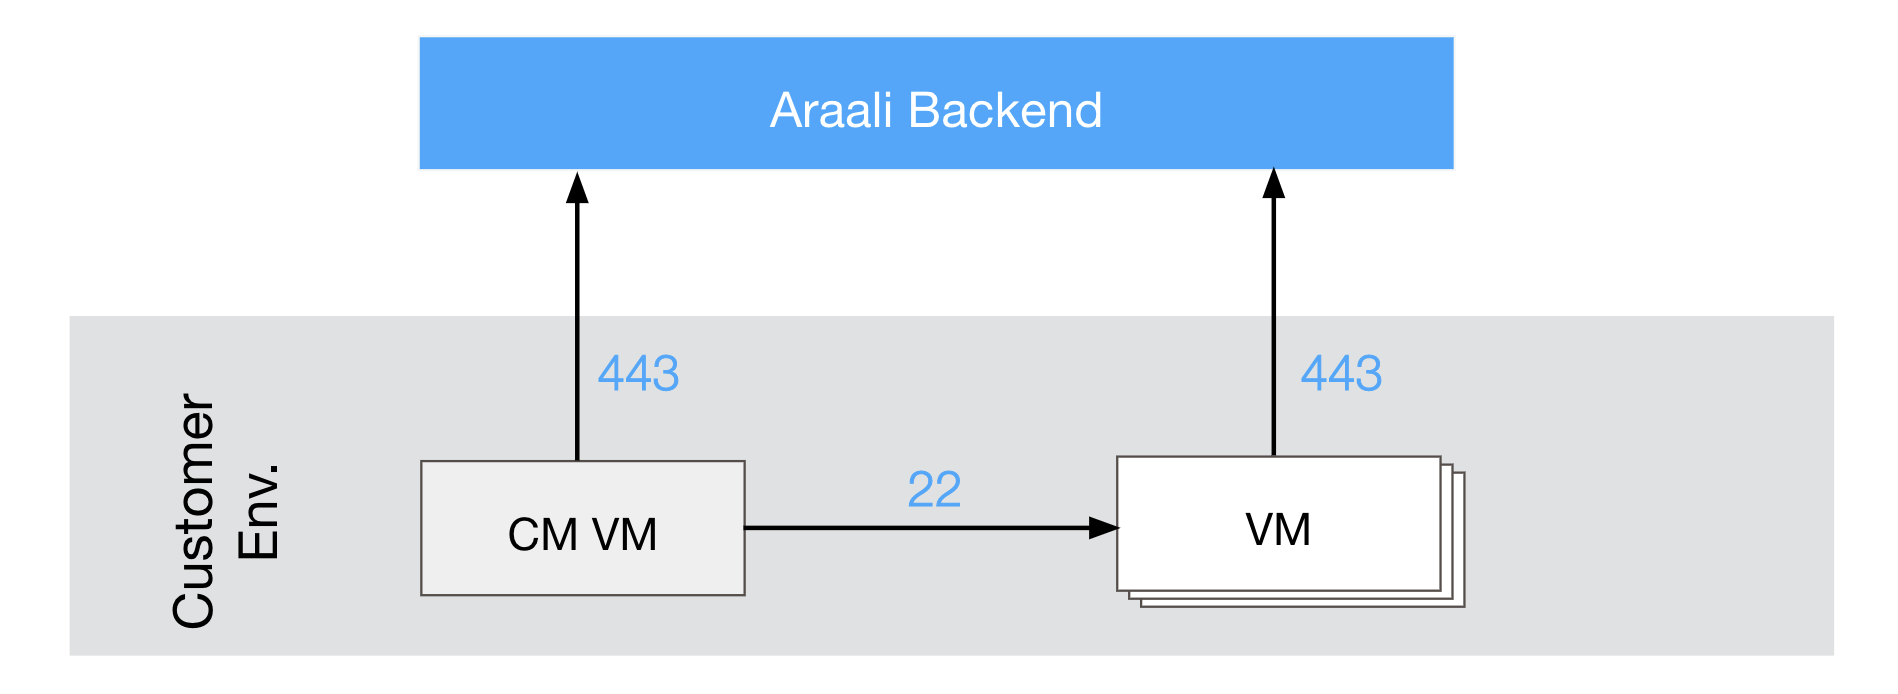
It is important that araalictl is downloaded and authorized on the Control VM so that it can remotely install Araali on the rest of the VMs.
Remotely Fortify
./araalictl fortify-live -fortify -tags=zone=<zone_name>,app=<app_name> <remote_user>@<remote_host>
Uninstall Araali
Self:
./araalictl fortify-live -unfortify localhost
Remote:
./araalictl fortify-live -unfortify <remote_user>@<remote_host>